A test definition defines which test definition steps, test definition result records, and lab input records (such as instruments or consumables) LIMS needs to generate when a Test is created. The result definitions and inputs are defined on steps and reflect what the test definition procedure requires to be captured during test execution.
Test Definition Version Control
Test Definition records are subject to Veeva LIMS version control. Once these records are Approved, they become locked and cannot be edited. Instead, you must create a new version using the Create New Version action on the record.
When a test definition is created, Veeva LIMS automatically creates an associated LIMS Change Analysis record in the background. As part of the Change Analysis process, records referenced by the new version of the Test Definition (e.g., another Test Definition record, Spec Data records) will also have a new version created (managed by the Change Analysis).
Creating Test Definitions
To create a Test Definition record:
- Navigate to Business Admin > Test Definitions, or to a custom object tab.
- Click Create.
- Enter a Name.
- Optional: Enter an Estimated Duration.
- Click Save.
Adding Test Definition Steps to your Test Definition
Each Test Definition contains one or more Test Definition Steps. At test execution, steps will contain one (1) or more inputs or results and they typically correlate to one (1) or more steps within the method document.
Note: Depending on system configuration, Veeva LIMS may automatically create a Default step when the Test Definition record is created. The name of this Default step can be modified.
To create a Test Definition Step:
- Navigate to the Test Steps section of a Test Definition record.
- Click Create.
- Enter a Name.
- Enter an Order. This determines the order the step will be presented within the test execution page.
- Click Save.
Repeat for additional Test Definition Steps.
Adding Test Definition Results to your Test Definition
Each Test Definition contains one or more Test Definition Results, which Lab Results are created from at runtime. Test Definition Results contain many attributes that determine how the Lab Result will be displayed, how the data will be entered, what values it will accept, and even how the values will be formatted for the lab analyst in the test execution page.
To create a Test Definition Result:
- Navigate to the Result Definitions section of a Test Definition record.
- Click Create.
- Select a result type from the drop-down. The result types available are:
- Numeric (includes the option to define a calculation)
- Picklist
- Date
- Date Time
- Text
- Enter a Name. This is how the Lab Result label will appear in the test execution grid.
- Optional: Select a Result Level. This field indicates whether the Test Definition Result applies to all Tests in a given Test Set (Test Set level) or individually per Test (Test level.) The default is Test level.
- Select a Test Definition Step. If only one (1) Test Definition Step exists, it will be defaulted.
- Enter an Order. This determines the Test Definition Step’s positioning among the other results in the test execution grid.
- Select a Data Entry Method:
- Manual: Allows the user to input the value during test execution.
- Integration: The value is drawn from data via Vault integrations.
- Calculation: The value is the result of a predefined calculation. This entry method is only available for the Numeric Result definition type.
- Select the Required? Yes/No field to define if a value must be populated during test execution.
- For a Numeric Result, populate the following fields as applicable:
- Unit of Measure
- Notation (standard or scientific eNotation)
- Rounding Rule (USP or ASTM)
- Precision Type (Decimal Places or Significant Figures)
- Precision: Enter a numeric value. This is to format the result for display purposes during test execution. For whole numbers, the Precision value should be 0.
- Optional: For a Numeric Result, you can also set LOD and LOQ if configured by an Admin. See About Limits of Detection and Quantification.
- For a Picklist Result you must select a Lab Result Picklist record from the drop-down, which determines the picklist from which the lab Analyst will select a picklist value during test execution. This is a LIMS object, not the platform Picklist component.
- Click Save.
About Limits of Detection and Quantification
Limits of Detection (LOD) and Limits of Quantification (LOQ) represent limits to what Lab Analysts can reliably detect and quantify. A Limit of Detection is the lowest value that a given analytical method or instrument can reliably detect. Likewise, a Limit of Quantification is the lowest value that the analytical method or instrument can detect and measure with an acceptable level of precision and accuracy. If configured, you can specify one or both of these limits for numeric Test Definition Results.
In order to configure LOD and LOQ, an Admin must add fields to the following object layouts:
| Object | Fields to Add |
|---|---|
Lab Test Result (lims_test_result__v) |
Below LOD? (below_lod__v), Below LOQ? (below_loq__v) |
Lab Test Definition Result (lims_test_definition_result__v) |
LOD (lod__v), LOD Entry Options (lod_entry_options__v), LOD Calculation Value (lod_calculation_value__v), LOD Formatted Value (lod_formatted_value__v), LOQ (loq__v), LOQ Entry Options (loq_entry_options__v), LOQ Calculation Value (loq_calculation_value__v), LOQ Formatted Value (loq_formatted_value__v) |
Lab Test Definition Variation Result (lims_test_definition_variation_result__v) |
LOD (lod__v), LOD Entry Options (lod_entry_options__v), LOD Calculation Value (lod_calculation_value__v), LOD Formatted Value (lod_formatted_value__v), LOQ (loq__v), LOQ Entry Options (loq_entry_options__v), LOQ Calculation Value (loq_calculation_value__v), LOQ Formatted Value (loq_formatted_value__v) |
To specify LOD while creating a Numeric Result, scroll down to the LOD/LOQ section and complete the following fields:
- LOD: A numeric value representing the Limit of Detection. Any result less than this value is considered below LOD, but the value itself is an acceptable result. If you are configuring both LOD and LOQ for the Test Definition Result, this value must be smaller than the LOQ value.
- LOD Entry Options: The acceptable text strings for entry in the Test Execution grid. Choose one or more options.
- ND: The literal string
ND - Not Detected: The literal string
Not Detected - < LOD: The literal string
< LOD - < LOD Numeric Value: A string with an interpolated numeric value. For example,
< 3 - < LOD Numeric Value Unit: A string with an interpolated numeric value and unit value. For example,
< 3 g
- ND: The literal string
- LOD Formatted Value: How the entry option will be formatted in the Test Execution UI. Choose one option. This field uses the same values as LOD Entry Options.
- LOD Calculation Value: The value is used in calculations if the result is below the Limit of Detection.
- 0
- LOD or LOQ Limit Value
- Value Entered or LOD or LOQ
- Value Entered or LOD/2 or LOQ/2
- Value Entered or Zero
To specify LOQ while creating a Numeric Result, scroll down to the LOD/LOQ section and complete the following fields:
- LOQ: A numeric value representing the Limit of Quantification. If you are configuring both LOD and LOQ for the Test Definition Result, this value must be larger than the LOD value.
- LOQ Entry Options: The acceptable text strings for entry in the Test Execution grid. Choose one or more options.
- < LOQ: The literal string
< LOQ - < LOQ Numeric Value: A string with an interpolated numeric value. For example,
< 3 - < LOQ Numeric Value Unit: A string with an interpolated numeric value and unit value. For example,
< 3 g
- < LOQ: The literal string
- LOQ Formatted Value: How the entry option will be formatted in the Test execution UI. Choose one option. This field uses the same values as LOQ Entry Options.
- LOQ Calculation Value: The value used in calculations if the result is between the Limit of Detection and the Limit of Quantification.
- 0
- LOD or LOQ Limit Value
- Value Entered or LOD or LOQ
- Value Entered or LOD/2 or LOQ/2
- Value Entered or Zero
Adding Test Definition Criteria to your Test Definition
Test Definition Criteria, like its counterpart for Spec Data, allows Design Data Admins to define the acceptable criteria for Test Definition Results. Where Spec Data Criteria allows you to set these criteria at the individual Test level, Test Definition Criteria applies at the Test Set level.
To add Test Definition Criteria to a Test Definition:
- On your Test Definition’s Object Details page, expand the Test Definition Criteria section.
- Click Create.
- In the Test Definition Criteria Type field, select Operational Criteria.
- Click Continue.
- Select a Result to Evaluate.
- Select an Indication. This field determines how the criteria is represented during test execution and whether failing it prevents spec conformance.
- Select at least one Purpose.
- Define a formula in the Criteria field that controls data limits based around the
$resulttoken, for example:$result < 0.5 - Enter a Criteria Description. This field serves as a human-readable explanation of the Criteria formula.
- Click Save.
Add Test Definition Inputs to your Test Definition
In addition to Test Definition Results, you can also define the Test Definition Inputs that should be captured during test execution. These include specific instruments (assets) and consumables that should be used in the test.
To create a Test Definition Input:
- Navigate to the Inputs (Assets and Consumable) section of a Test Definition record.
- Click Create.
- Select an input type from the drop-down. The input types available are:
- Consumable
- Instrument
- Enter a Name.
- Select a Test Definition Step. If only one (1) Test Definition Step exists, it will be defaulted.
- Enter an Order. This determines the Test Definition Step’s positioning among the other results in the test execution grid.
- Select a Consumable Family or Instrument Family. During test execution, the inputs available for selection will be limited to records having the same family value.
- Select the Required? Yes/No field to define if a value must be populated during test execution.
- For Consumable input types, optionally populate the Expected Amount and Expected Amount Unit fields. These values will be displayed to the lab analyst during test execution where they can record the actual amount used.
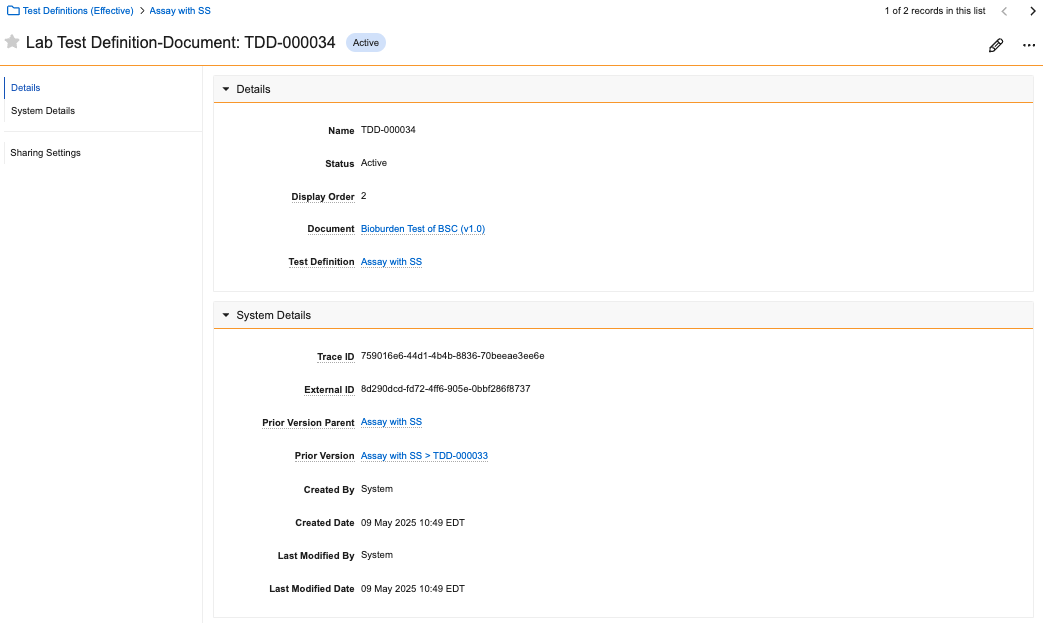
Add Test Definition Documents to your Test Definition
You can add documents such as methods, procedures, or training videos to a Test Definition as needed from the Test Definition’s Object Details page.
To add a Test Definition Document:
- Expand the Test Definition Documents section.
- Click Create.
- Select a Status.
- Enter a Display Order. This determines the order in which documents will be displayed to the lab analyst during test execution.
- Select a Document.
- Click Save.
After creating a Test Definition Document, you can visit its Object Details page to make changes or view version history information in the System Details section. The system does not allow you to add duplicate documents (the same document and version combination) to the same Test Definition.
Add Variations to your Test Definition
In some cases, it may be necessary for laboratory tests to include multiple variations for things such as differences in analysis approach, product makeup, or units. In Veeva LIMS, you can add Variations to a Test Definition to capture these needs. Creating a Test Definition Variation is optional. However, if a Test Definition has one or more Variations, runtime tests can only be created from a Variation and not the base Test Definition.
To add a variation to your Test Definition:
- Navigate to your Test Definition record and set the Has Variations? field to Yes.
- In the Lab Test Definition Variations section, click Create.
- Enter a Name.
- Optional: Enter a Description of the Variation.
- Click Save.
From your newly created Lab Test Definition Variation record, you can add Lab Test Definition Variation Inputs or Lab Test Definition Variation Results as needed based on the Test Definition Inputs and Test Definition Results that exist in the Test Definition record.
To create a Lab Test Definition Variation Input:
- In the Actions menu, select Create Variation Inputs. This action is only available if the base Test Definition has Inputs.
- In the following dialog, select one or more Test Definition Input records. The records displayed are the Test Definition Inputs in the Test Definition for which a corresponding Test Definition Variation Input record has not been created.
- Click OK.
The system creates a Test Definition Variation Input record for each Test Definition Input selected. If any values need to be modified (for example, Required, Expected Amount, or Expected Amount Units), you can make the necessary changes on the applicable Test Definition Variation Input record.
To add more Test Definition Variation Input records, repeat the steps above as needed.
To create a Lab Test Definition Variation Result:
- From the Actions menu, select Create Variation Results. This action is only available if the base Test Definition has Results.
- In the following dialog, select one or more Test Definition Result records. The records displayed are the Test Definition Results in the Test Definition for which a corresponding Test Definition Variation Result record has not been created. Test Definition Results with Aggregate Variables or Cross-Test Variables are excluded from the list.
- Click OK.
The system creates a Test Definition Variation Result record for each Test Definition Result selected. If any values need to be modified (for example, Required, Precision, Precision Type, or Unit of Measure), you can make the necessary changes on the applicable Test Definition Variation Result record.
To add more Test Definition Variation Result records, repeat the steps above as needed.
Note: For calculations, all variables must be defined at the Test Definition Result level. However, the calculation formula for a calculated Test Definition Variation Result does not need to utilize all variables defined on the Test Definition Result.
Note: When a Test Variation includes only Aggregate Results, its generated tests are set to the Testing Complete state when they are created.
About Lab Result Picklists
Unlike standard Vault picklists, Lab Result Picklists are object records, populated with related Lab Result Picklist Option records.This allows you to define what picklist options are available to the user for this specific result when they’re executing a Lab Test.