The Stability Study Builder feature allows Design Data Admins to create and manage Lab Studies and Lab Study Design records using a UI that makes the process faster and less error-prone. In order to use this feature, it must be configured by a Vault Admin.
For more general information about this feature, see About the Stability Study Builder.
To create a Lab Study Design using the Stability Study Builder:
- On the All Study Designs page, click + Create. This brings you to the Create view of the builder.
- Enter a Name.
- Select whether to Use Quantity Tracking.
- Select whether to Use Draft Spec Data.
- If this Study Design is intended to be a template, set Is Template to Yes. Template Study Designs can only include Timepoints, Conditions, and Orientations.
- Optional: Enter a Description.
- Optional: Select an Owning Site.
- Click Save + Next.
This navigates you to the Edit view where you can proceed through the steps listed in the left panel.
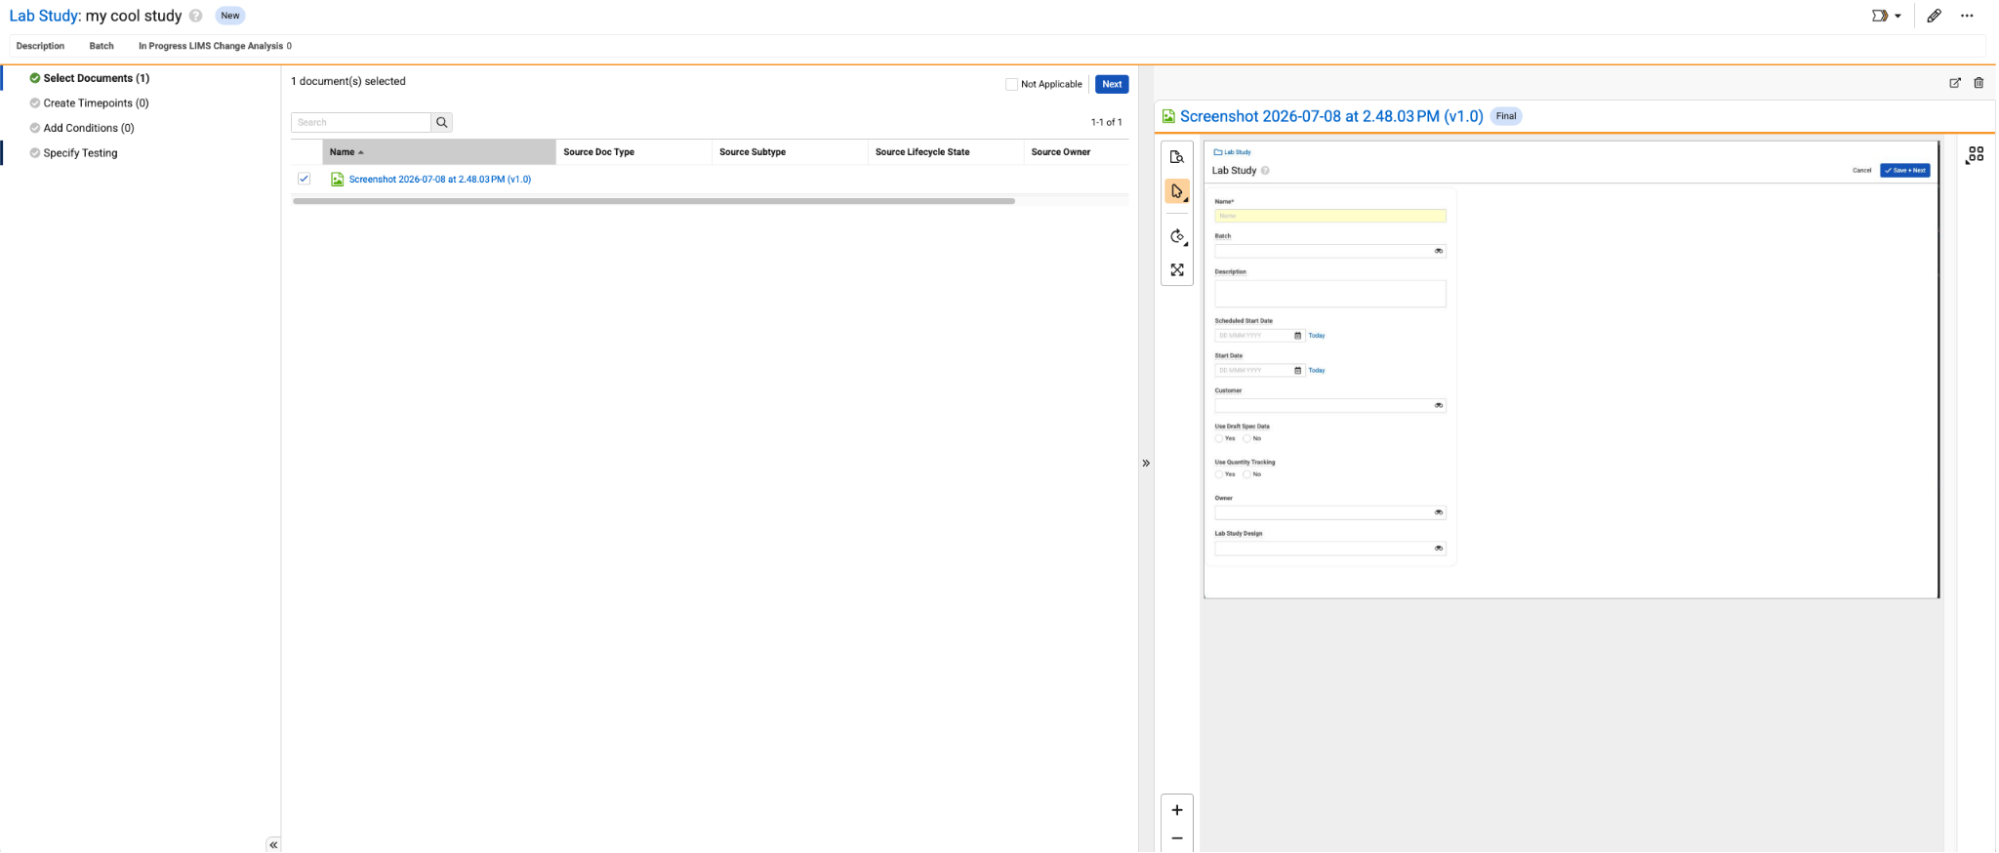
Select Documents
In this step, you can select one or more documents such as standard operating procedures to attach to your Lab Study Design. You can search and sort the documents as in the standard document viewer and view the selected documents in a collapsible panel to the right. If you do not need to attach a document, check the Not Applicable box.
Create Timepoints
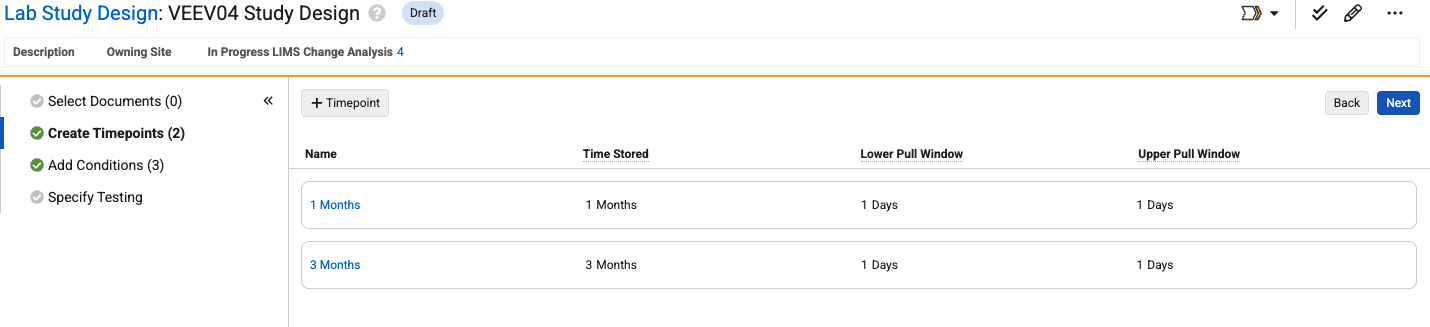
In this step, you can create Timepoints for your Lab Study Design. To create a Timepoint:
- Click + Timepoint.
- Enter a Time Stored.
- Select Time Stored Units.
- Enter a Lower Pull Window. This is used to calculate the earliest pull date.
- Select Lower Pull Window Units.
- Enter an Upper Pull Window. This is used to calculate the latest pull date.
- Select Upper Pull Window Units.
- Click Save.
- Repeat for as many Timepoints as necessary.
You can also edit or delete existing Timepoints inline on this screen.
Add Conditions
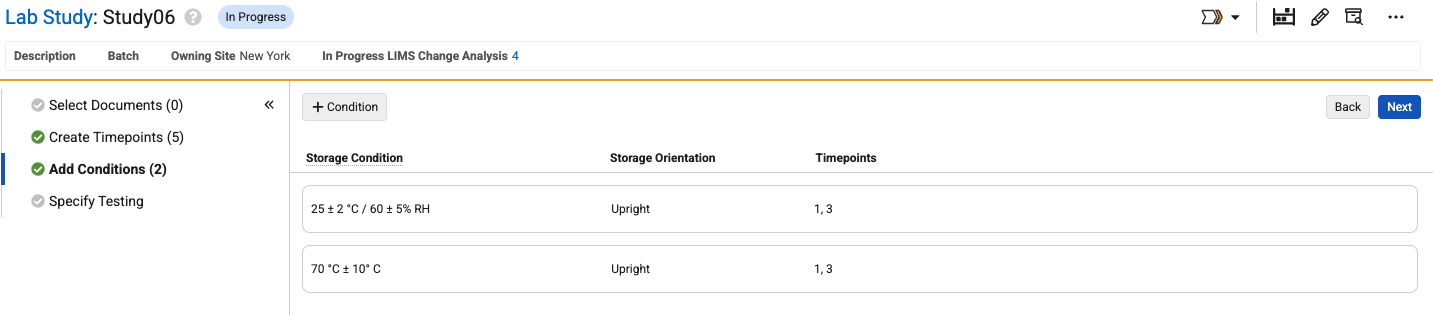
In this step, you can add conditions and orientations backed by Sample Definition records to the Lab Study Design. You can add a maximum of five condition/orientation combinations. To add a condition:
- Click + Condition.
- Select a Storage Condition.
- Select a Storage Orientation.
- Select one or more Timepoints. Initial Timepoints do not appear and cannot be selected.
- Click Save. The system does not allow you to save duplicate condition/orientation combinations.
You can also edit or delete existing conditions inline on this step. Hover over a condition’s line to see the Edit and Delete icons.
Note: The Add Conditions page ignores the Use Draft Spec Data toggle and always shows draft Spec Data/ Sample Plans.
Specify Testing
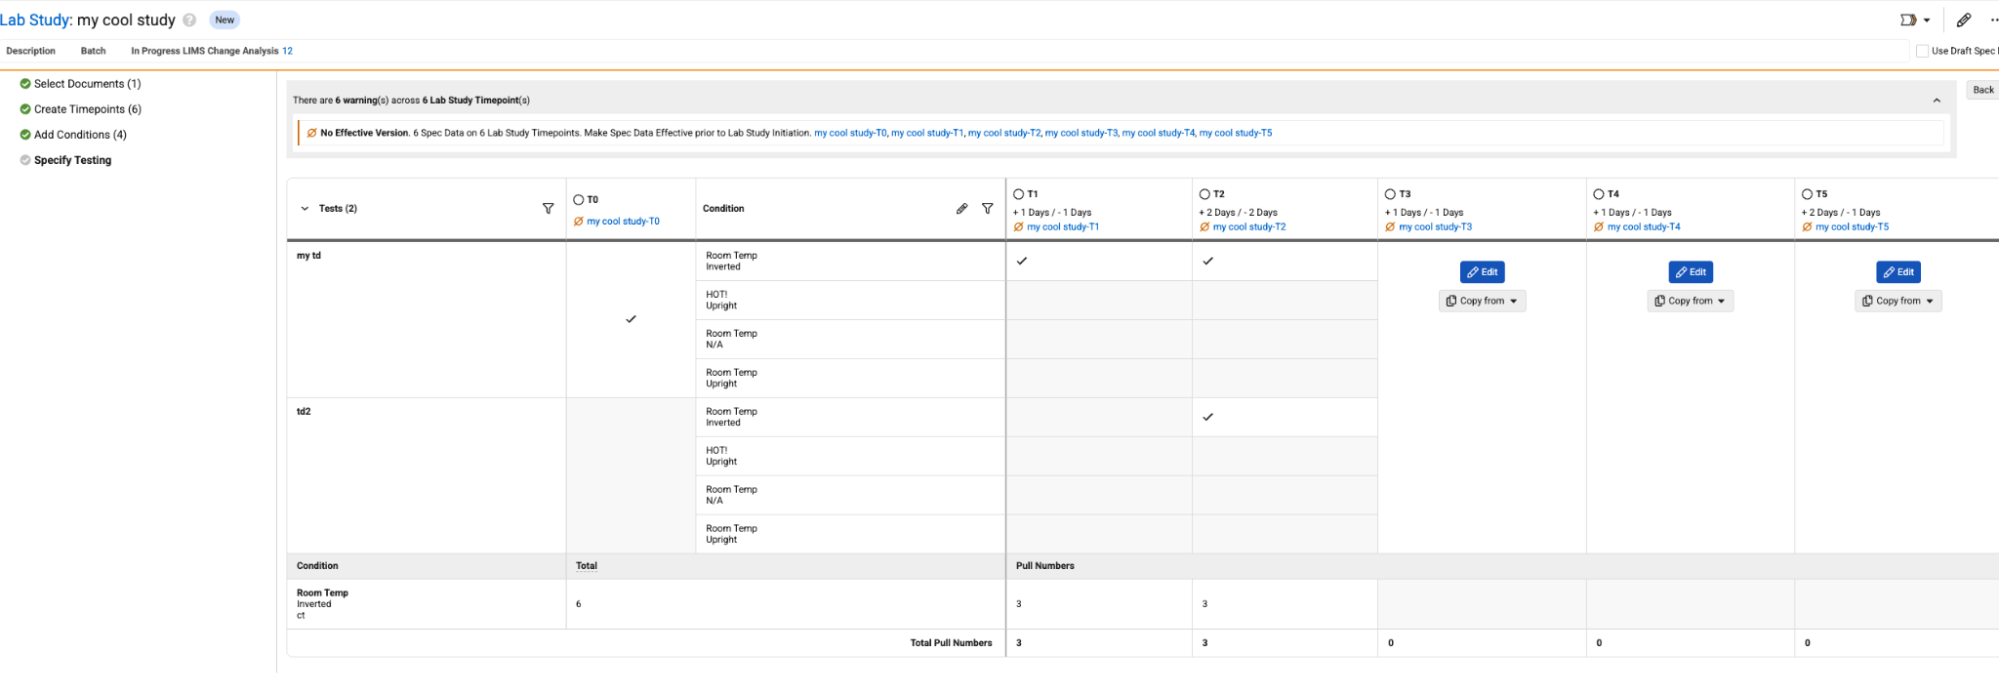
This step shows the full grid of Timepoints (columns) and available Tests (rows) with each Test row subdivided into rows for each available condition. If you have not yet configured any test actions, only the first column shows the Edit and Copy from buttons, but once at least one column has test actions configured, the buttons appear in all other columns. Populated columns show check marks in the cells where test actions are configured. You can still edit these cells using the inline Actions menu.
Each column also has an inline Actions menu that allows you to edit the Timepoint’s metadata, view the sharing settings, and edit, copy, or clear the Timepoint configuration.
About the Merge Spec Data Action
You can run the Merge Spec Data action to merge all Spec Data and Sample Plans for the current Study Design, thus simplifying the change analysis process by eliminating the need to navigate to each Spec Data individually. This excludes Spec Data for initiated Timepoints, cancelled Timepoints, and Spec Data with effective/approved Change Analysis records. After using this action, you must still complete change analysis on the Study’s Change Analysis record.